오오오오~~~ 물 방울이 예술이군요.*^^*
사이트 : http://www.davidhunt.ie/water-droplet-photography-with-raspberry-pi/
Drop Pi – Water Droplet Photography with Raspberry Pi
 Here’s how to build a Water Drop kit using a Raspberry Pi as a controller for a solenoid valve and camera trigger.
The Plan
(Standard disclaimer applies, batteries are a fire hazard, wiring them up incorrectly can cause a fire, burning, etc., not to mention possible damage to equipment. Do so at your own risk, etc).
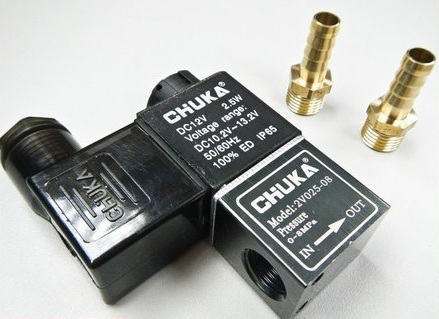
First, you’ll need to get yourself a solenoid valve. There’s loads of these on ebay for about €15.
We only need two GPIO pins, one for driving the solenoid valve, and the other for triggering the shutter of the camera. I used pins 17 and 18.
Since the solenoid is 12V, used a battery pack that takes 8 AA batteries, giving me about 11 volts, which works fine, and it’s more portable than needing an AC power supply. See my previous posts for a portable 5V power solution for the Raspberry Pi.
The Circuits
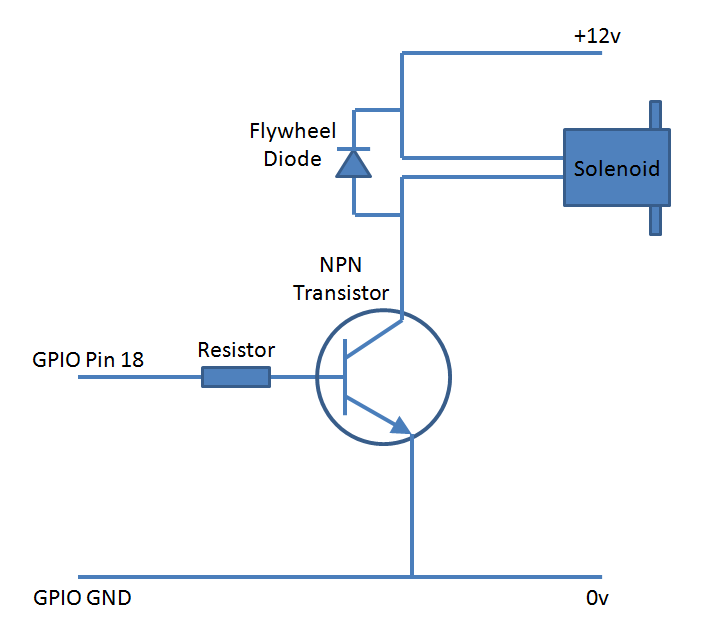
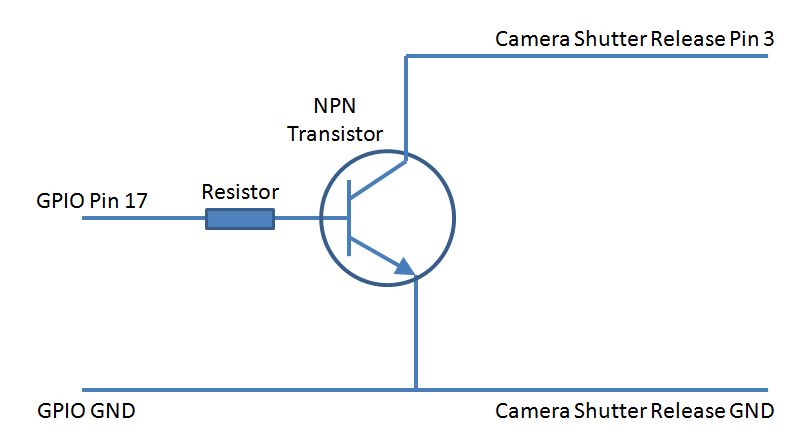
There’s a couple of (very) simple circuits to build, one for the solenoid, and one for the shutter release of the camera. In both cases, a 1K resistor should be fine.
First, the solenoid (revised after feedback to move the solenoid) (revised again to add the flywheel diode to protect the transistor against the inductive spike from the solenoid):
Next, the Shutter Release circuit:
The Code
This consists of a small bit of python. Run this each time you want to shoot two droplets and take a picture. The timings are suitable for when the solenoid valve is about 40cm above the surface of the water. Each drop is 100ms apart, just enough time for the first one to bounce back up and the second one to collide. You will need to adjust the timings for your own solenoid, camera, distance, etc.
import wiringpi
from time import sleep
gpio = wiringpi.GPIO(wiringpi.GPIO.WPI_MODE_GPIO)
shutterpin = 17
solenoidpin = 18
gpio.pinMode(shutterpin,gpio.OUTPUT)
gpio.pinMode(solenoidpin,gpio.OUTPUT)
wiringpi.pinMode(shutterpin,1)
wiringpi.pinMode(solenoidpin,1)

gpio.digitalWrite(solenoidpin,gpio.HIGH)
sleep(0.06)
gpio.digitalWrite(solenoidpin,gpio.LOW)

sleep(0.1)

gpio.digitalWrite(solenoidpin,gpio.HIGH)
sleep(0.05)
gpio.digitalWrite(solenoidpin,gpio.LOW)

sleep(0.12)
gpio.digitalWrite(shutterpin,gpio.HIGH)
sleep(0.1)
gpio.digitalWrite(shutterpin,gpio.LOW)
The Results
Here’s a few images using the solenoid above driven from the Raspberry Pi.
Here’s a series of just water:
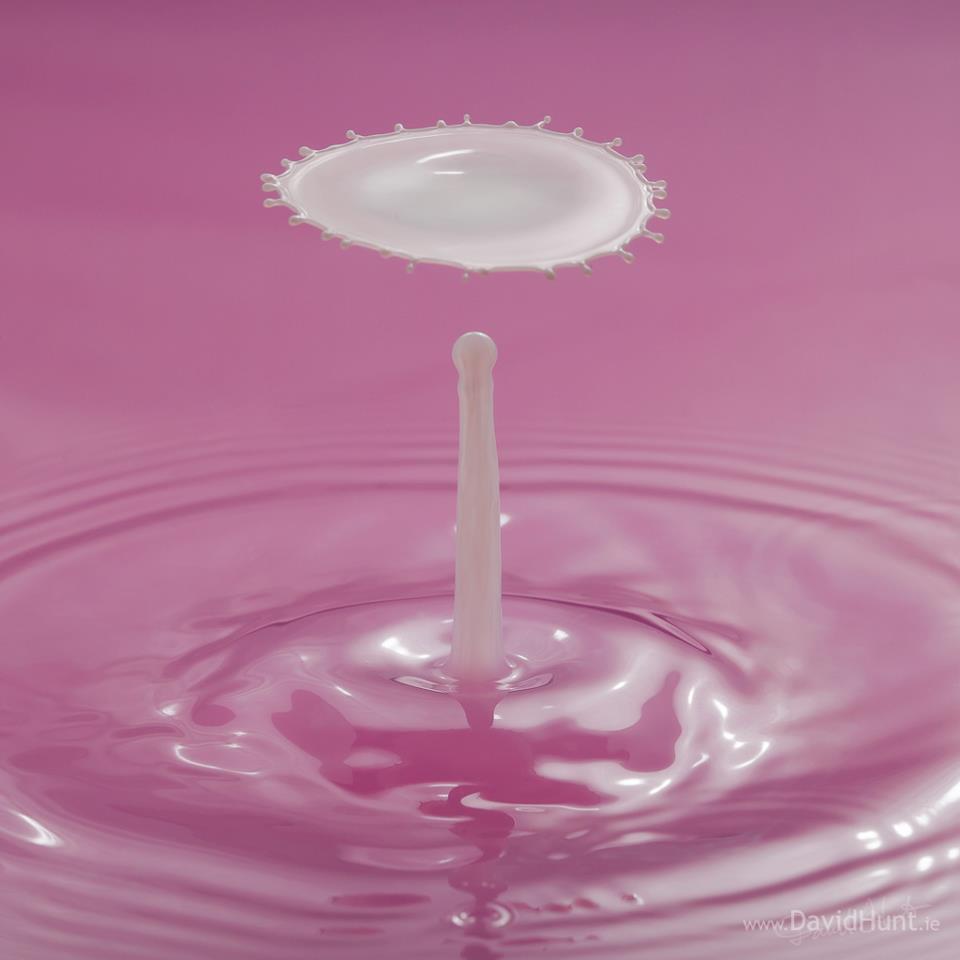
And here’s another using milk into a pool of water with a bit of red dye ink:
–edit–
Here’s a pic of the solenoid with water container.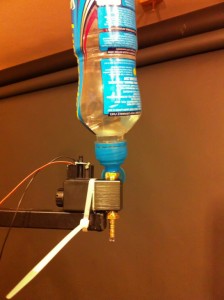
Raspberry Pi is a trademark of the Raspberry Pi Foundation
About the Author:
By day I’m a senior embedded Linux software engineer working with Emutex Ltd, an Embedded Software Solutions company in Limerick Ireland. In my spare time, I take pictures, and play with gadgets and technology.
Twitter: https://twitter.com/climberhunt @climberhunt
Facebook: https://www.facebook.com/davidhuntphotography
'라즈베리파이(RPI)' 카테고리의 다른 글
| [추천][해외] LapPi - A Raspberry Pi Netbook by SilverJimny (0) | 2014.11.21 |
|---|---|
| [추천] [해외] PortaBerry Pi: Handheld Raspberry Pi Emulator (0) | 2014.11.21 |
| [해외] PiPhone – A Raspberry Pi based Smartphone (0) | 2014.11.21 |
| [해외] Raspberry Eye (0) | 2014.11.21 |
| [버섯][추천][펌] Realtek Wi-Fi Direct Programming Guide (0) | 2014.11.21 |
